Setting up your scheduling page in Cogency takes just a few minutes. Follow this quick walkthrough and you’ll be ready to start booking meetings in no time.
1. Head to User > Profile
This is where it all starts.
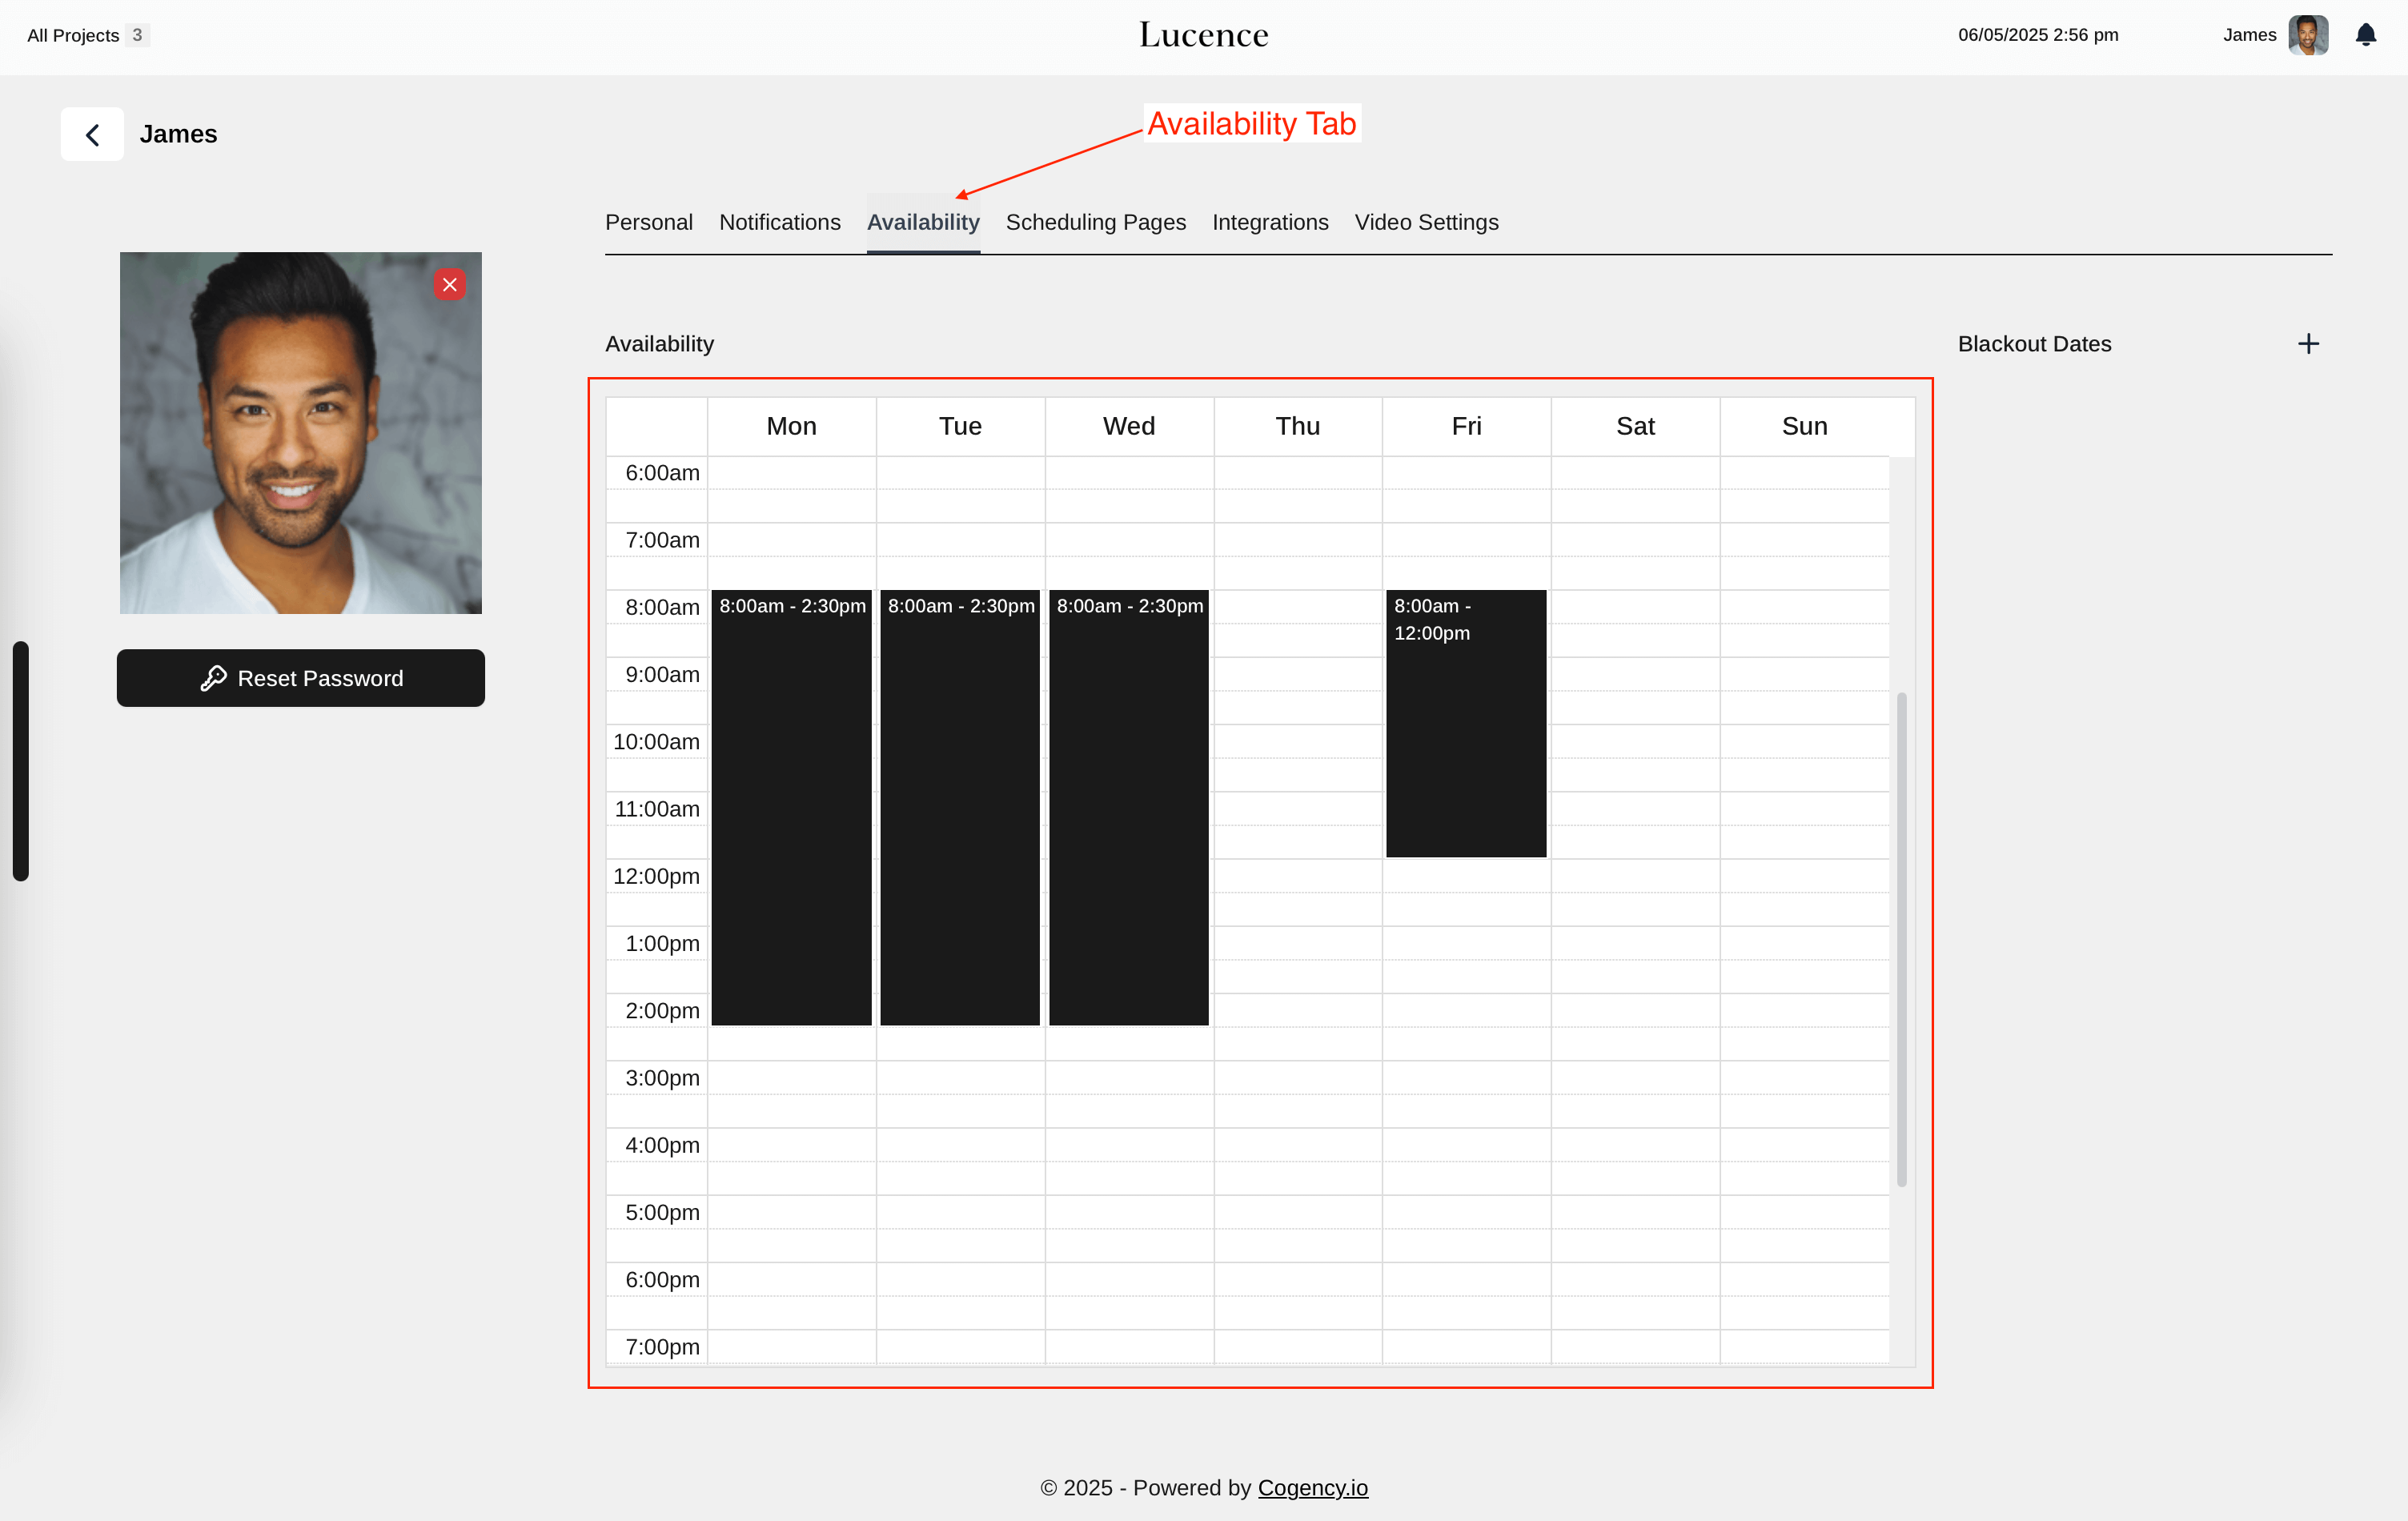
a. Set Your Availability
- Click the Availability tab.
- Add your working hours and days — this is when you’ll be available for meetings.
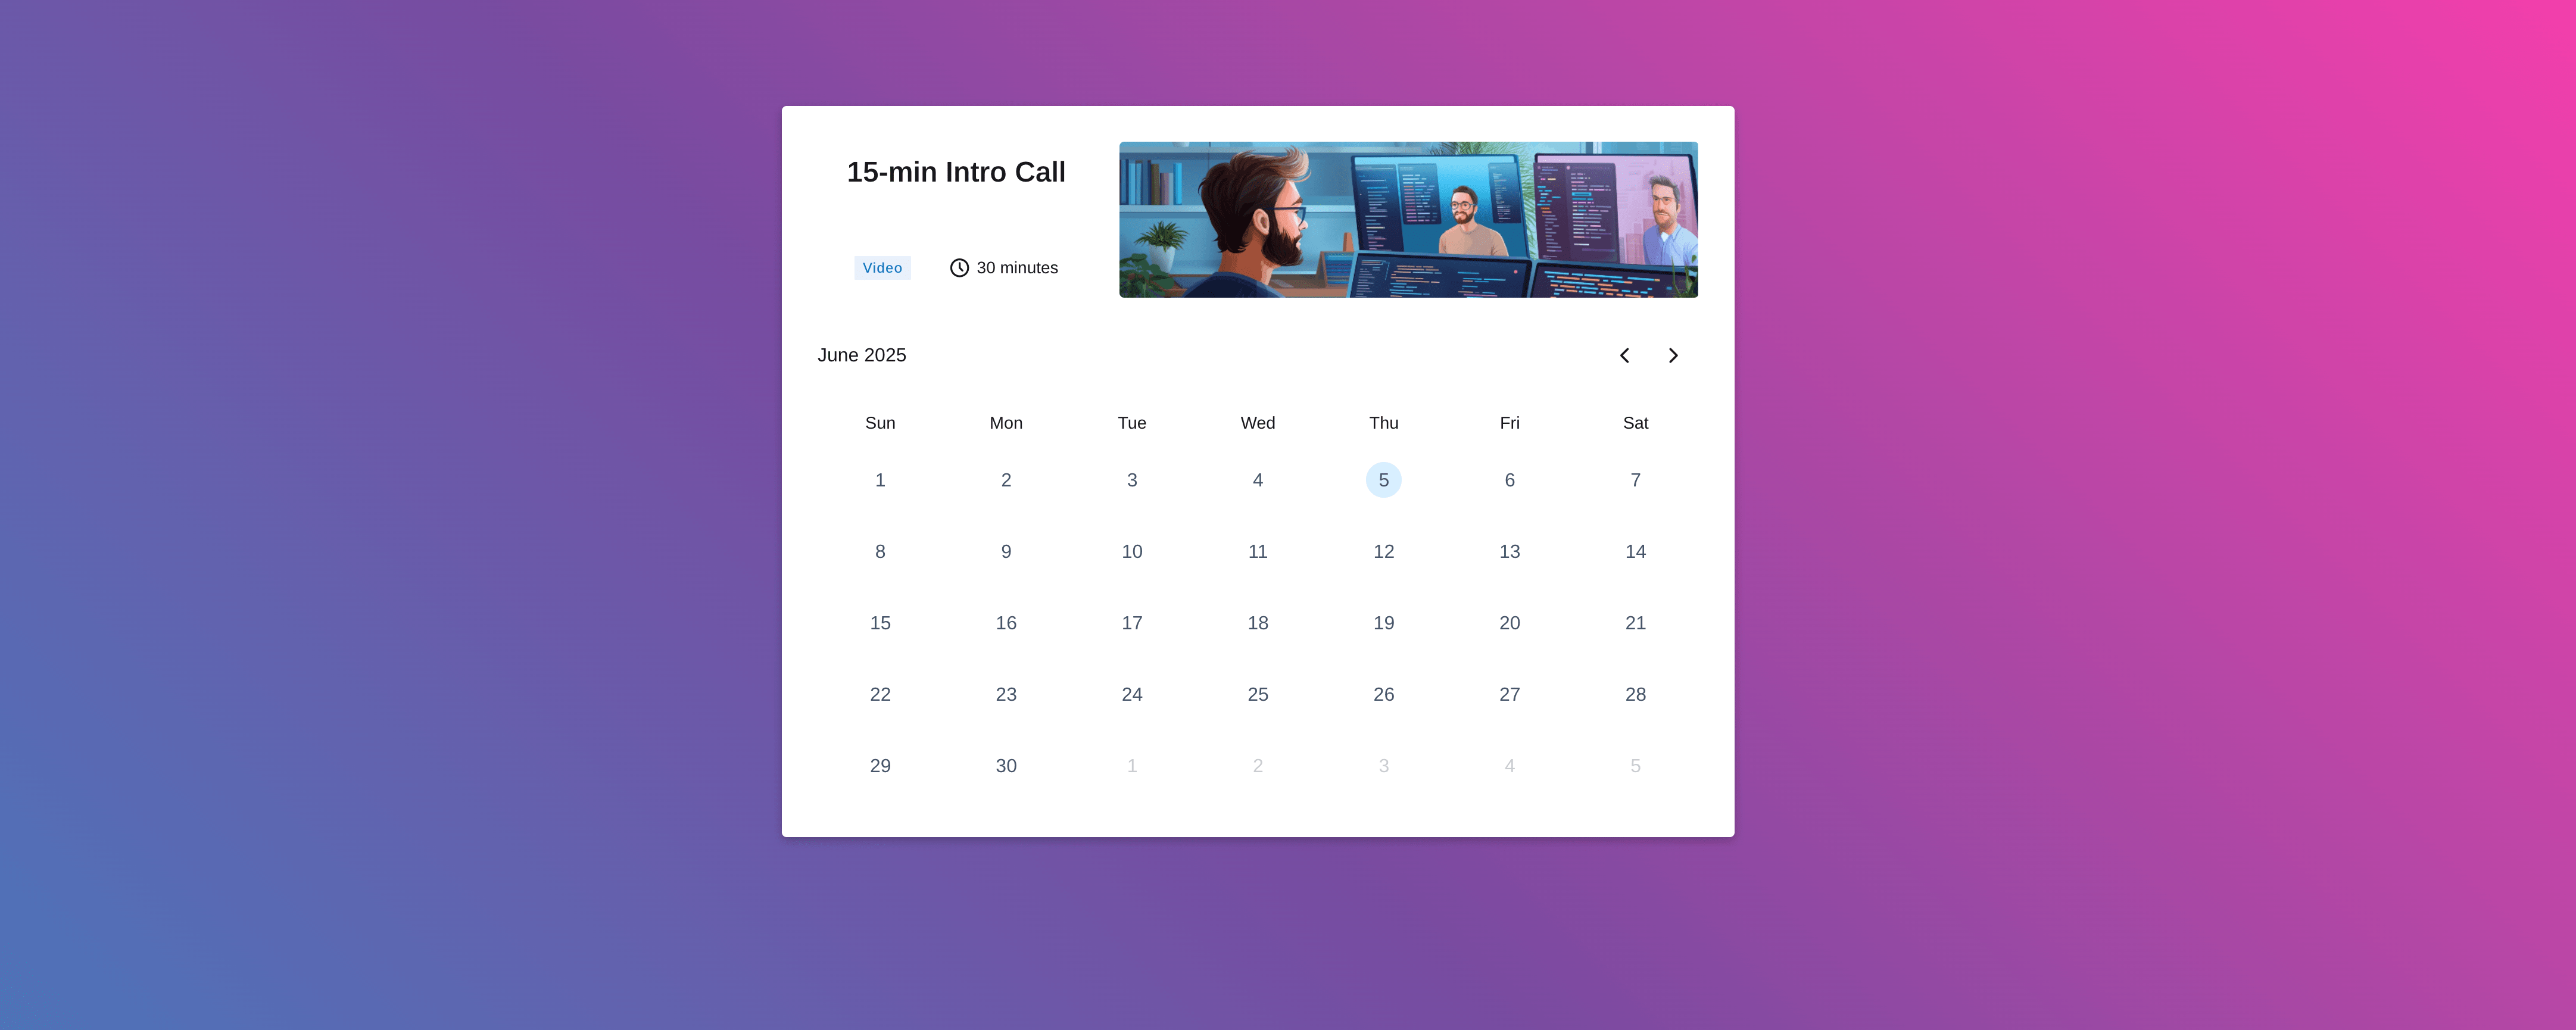
b. Create Your Scheduling Page
- Go to the Scheduling Pages tab.
- Click Create Scheduling Page, and give it a name (e.g., “15-min Intro Call” or “Strategy Session”).
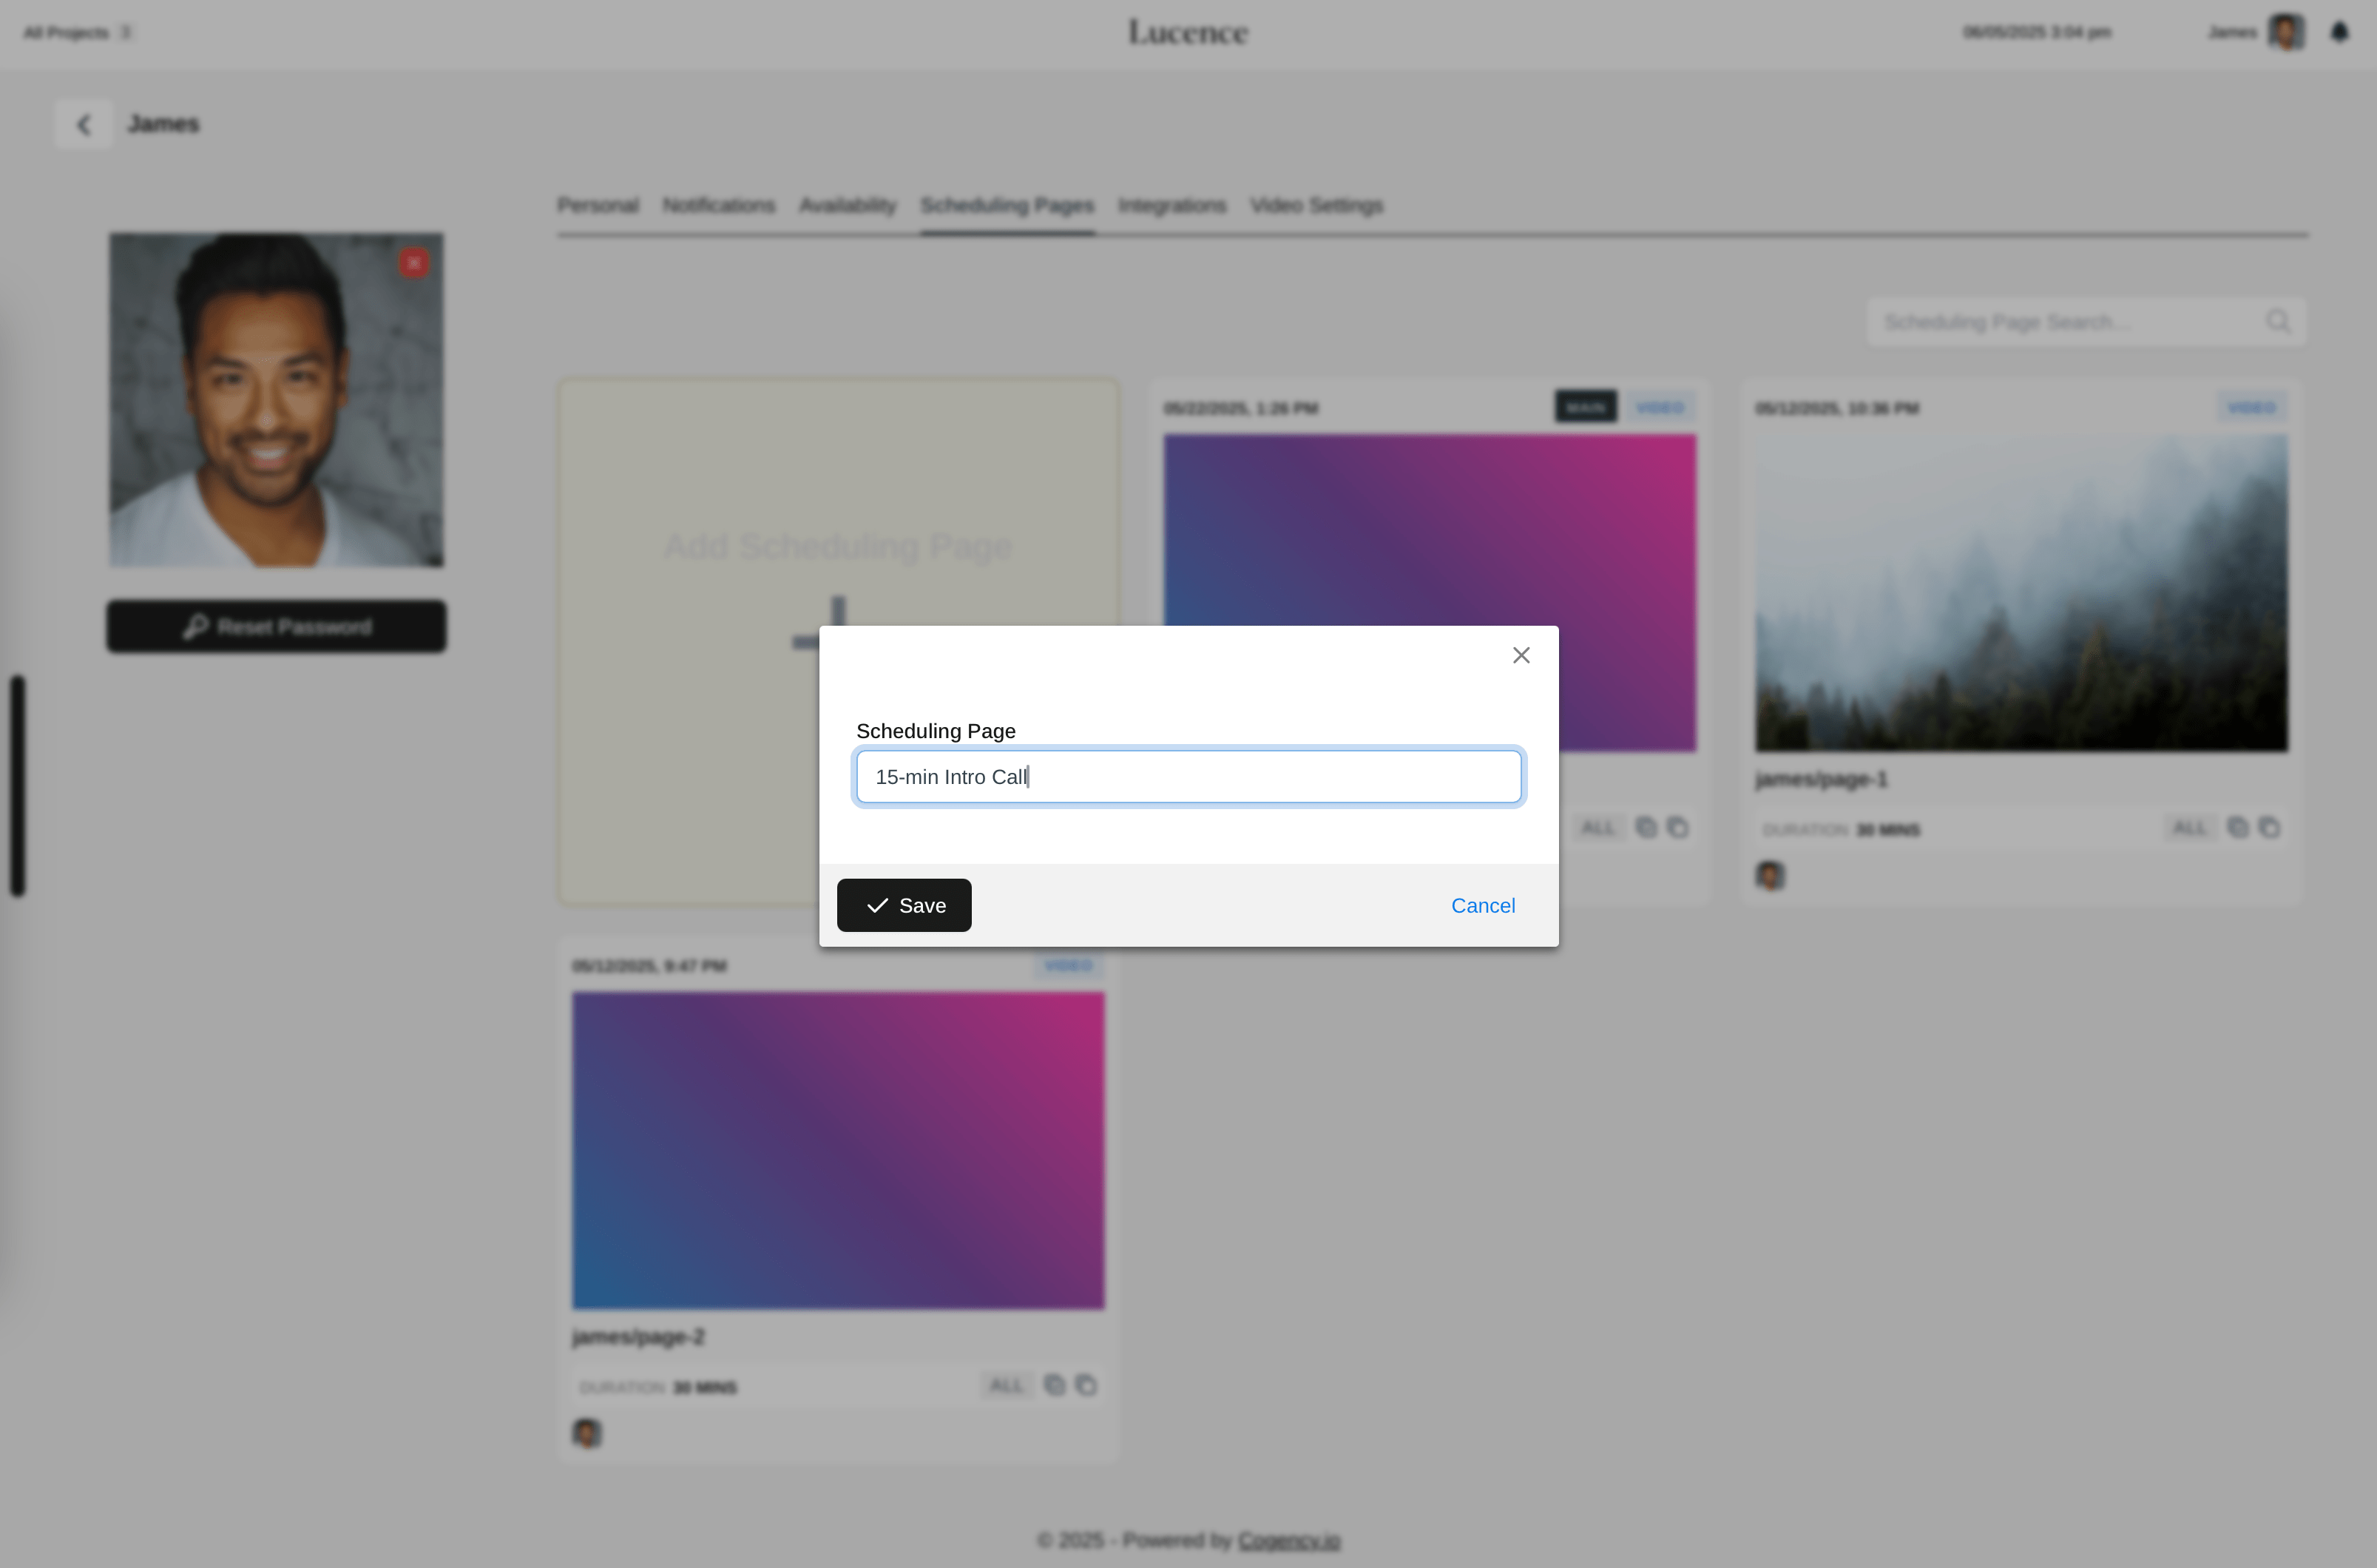
🟡 Note: After creating it, you’ll be automatically redirected to the scheduling page.
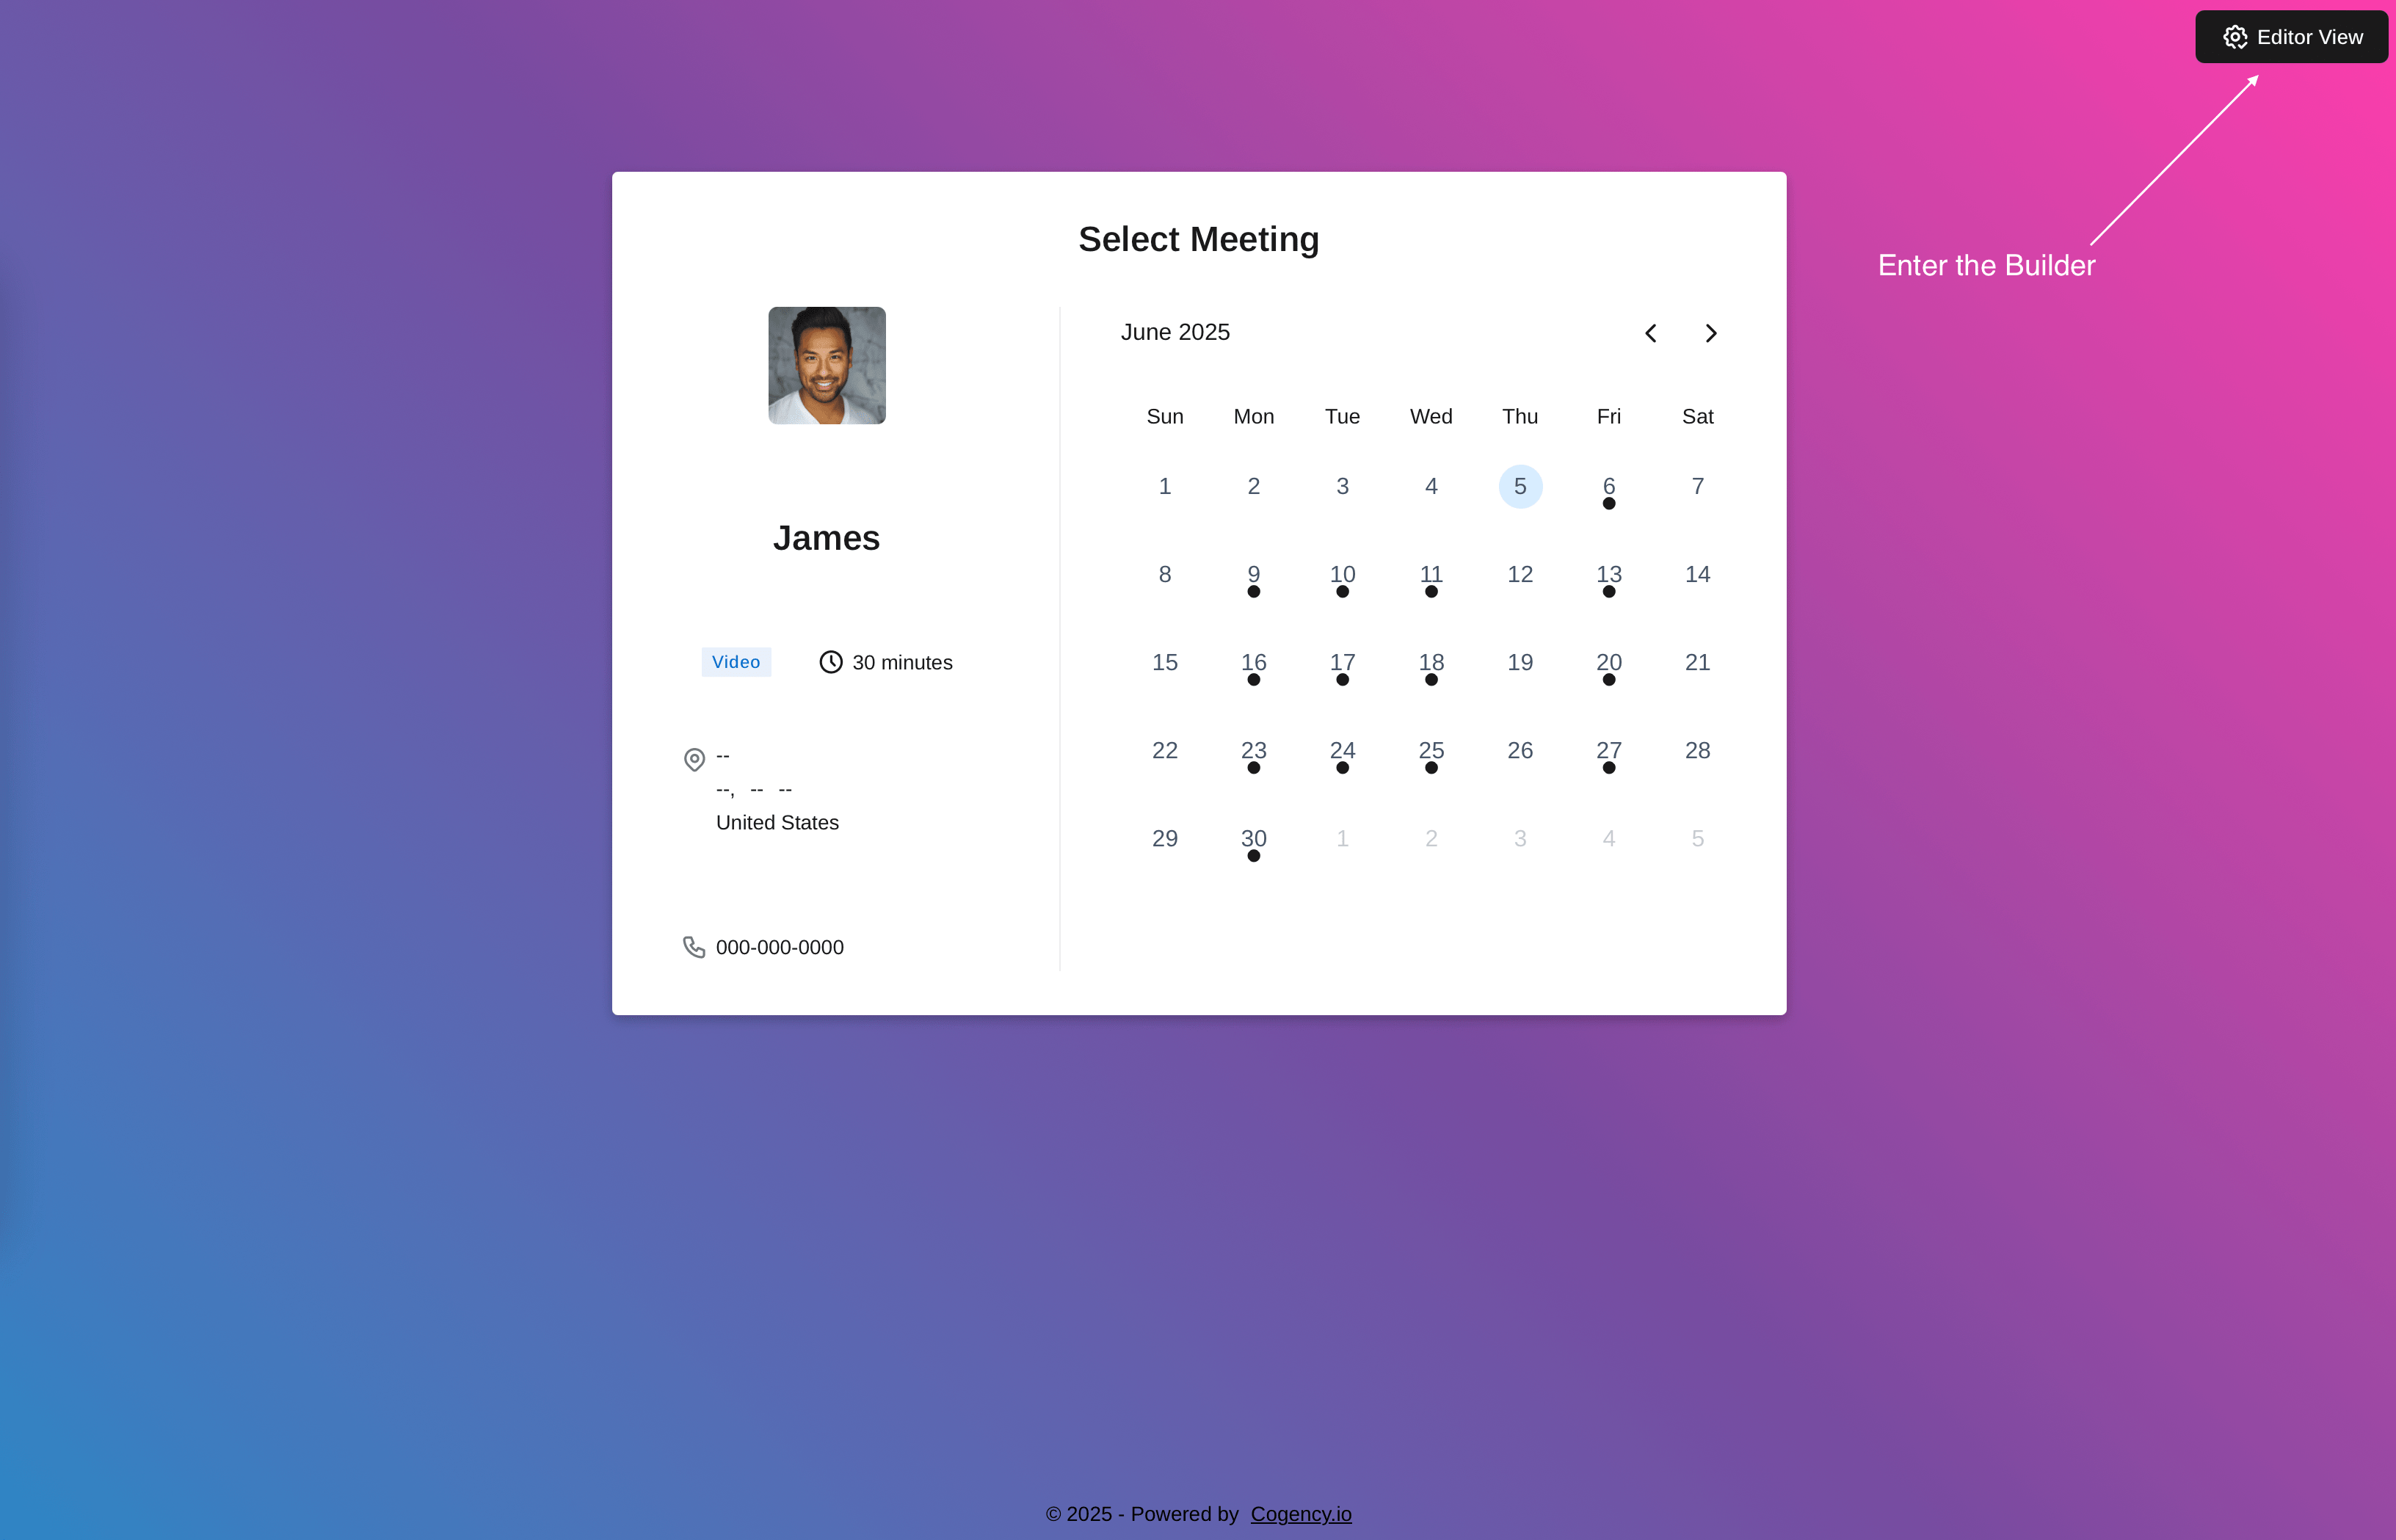
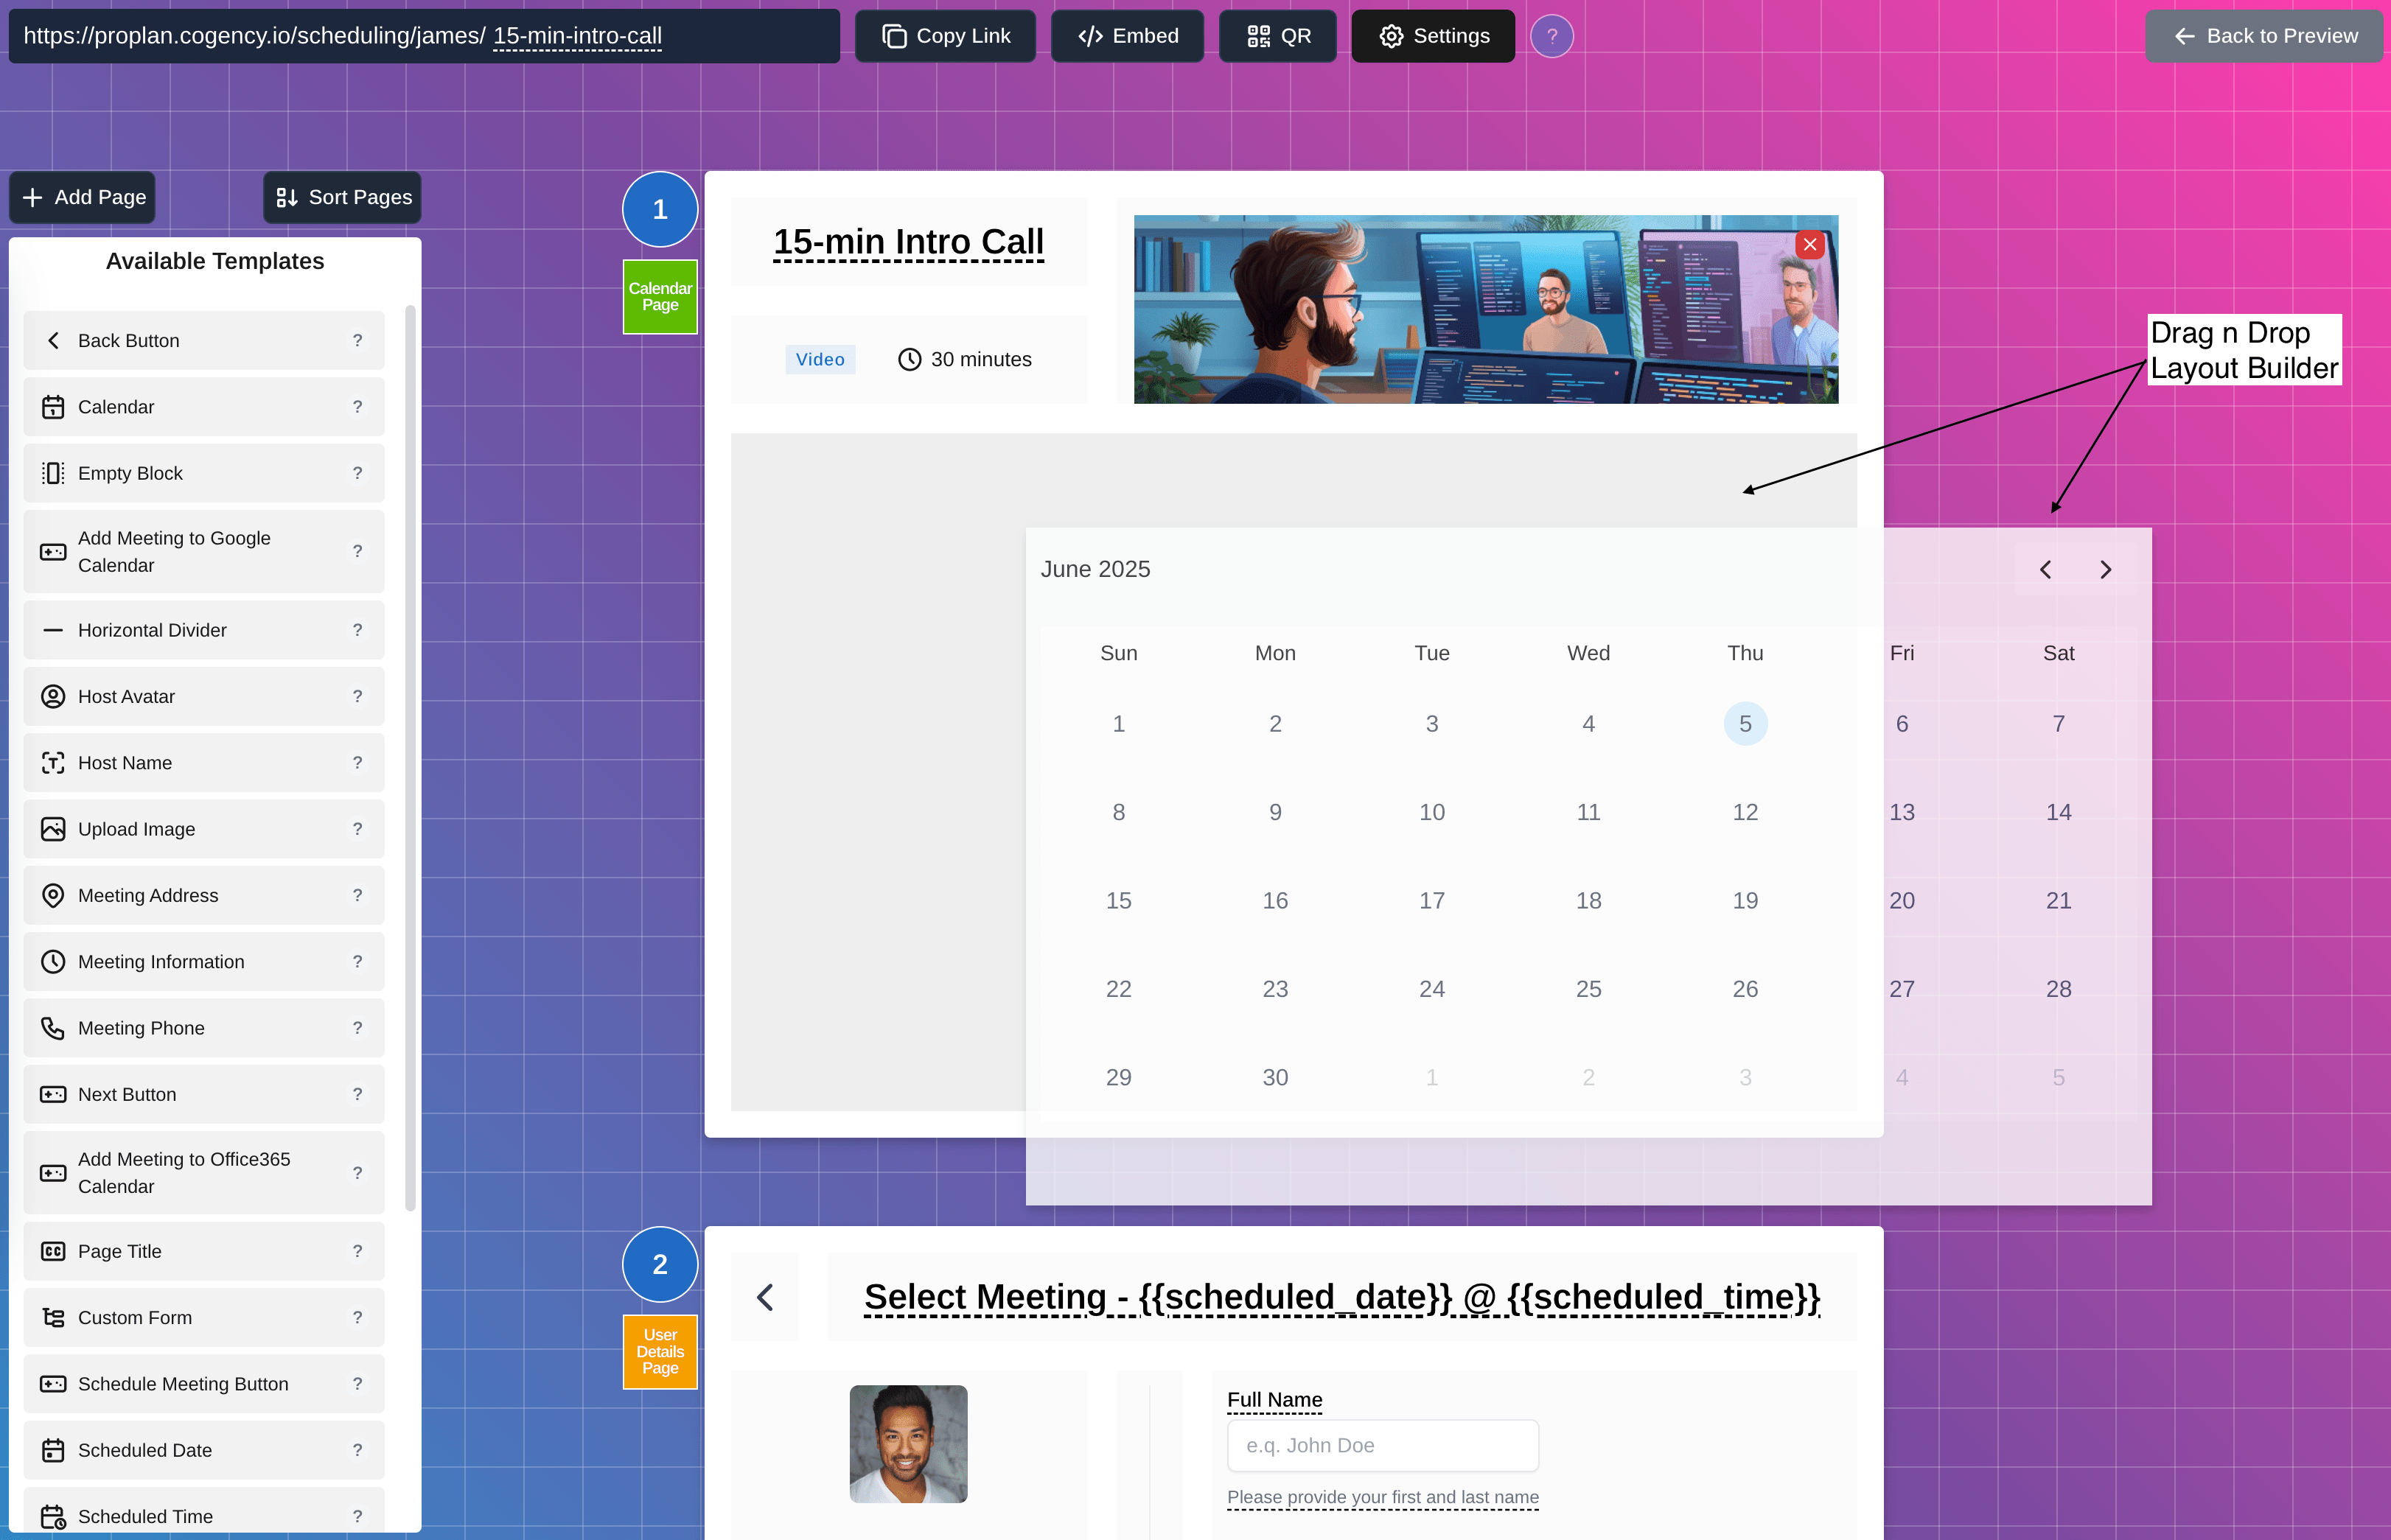
2. Click the Editor View Button
In the upper right corner, hit Editor View to enter the scheduling page builder.
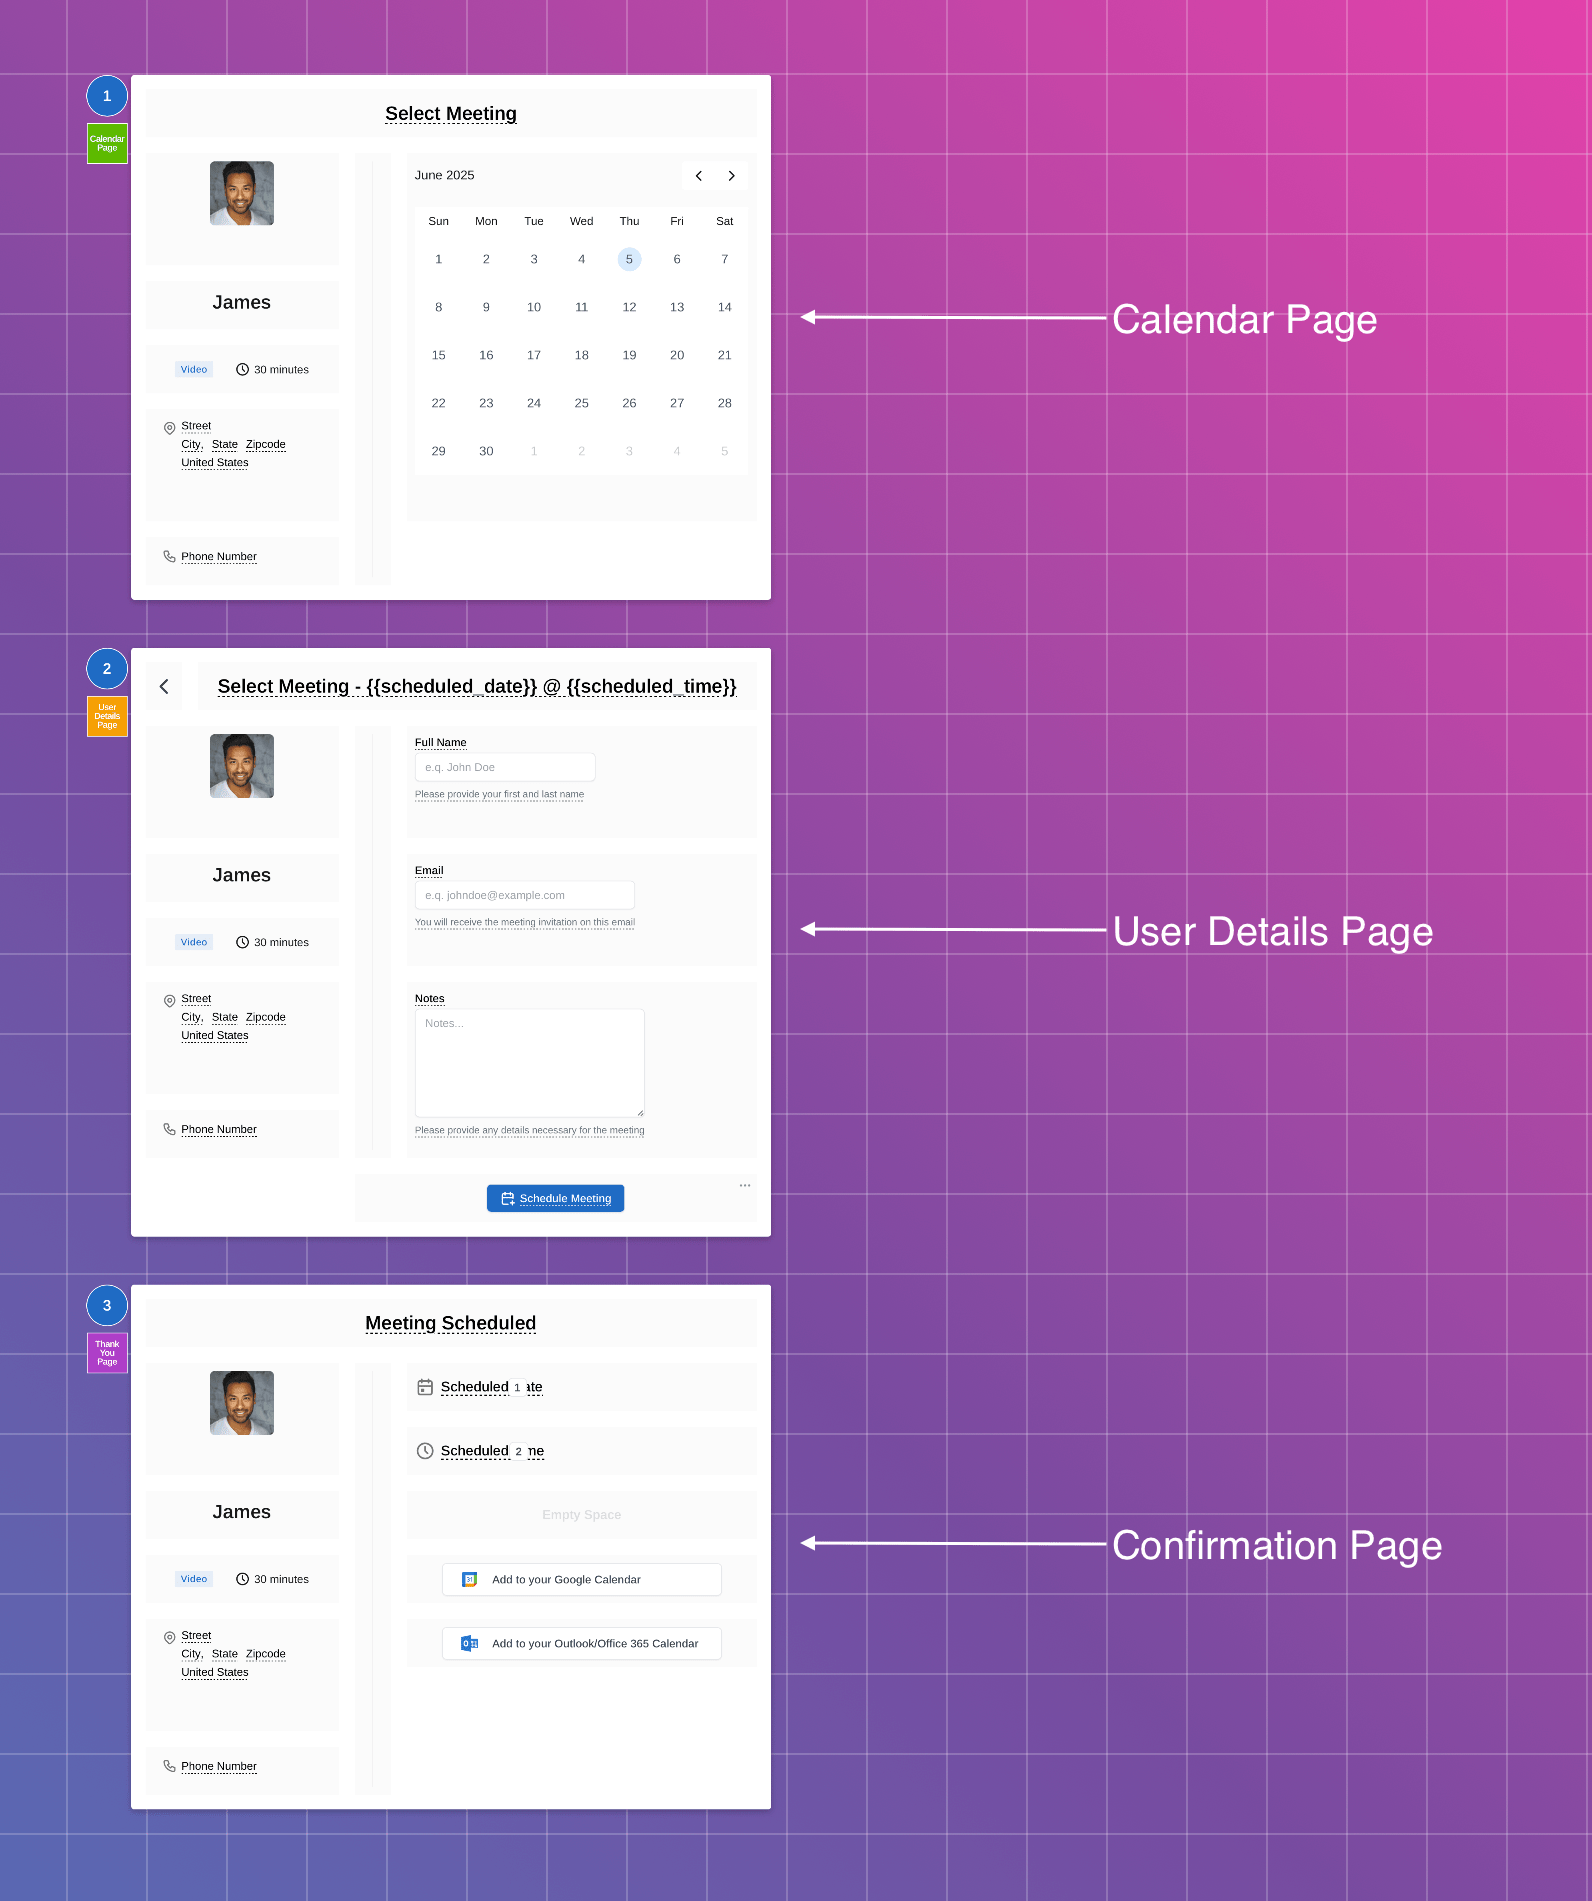
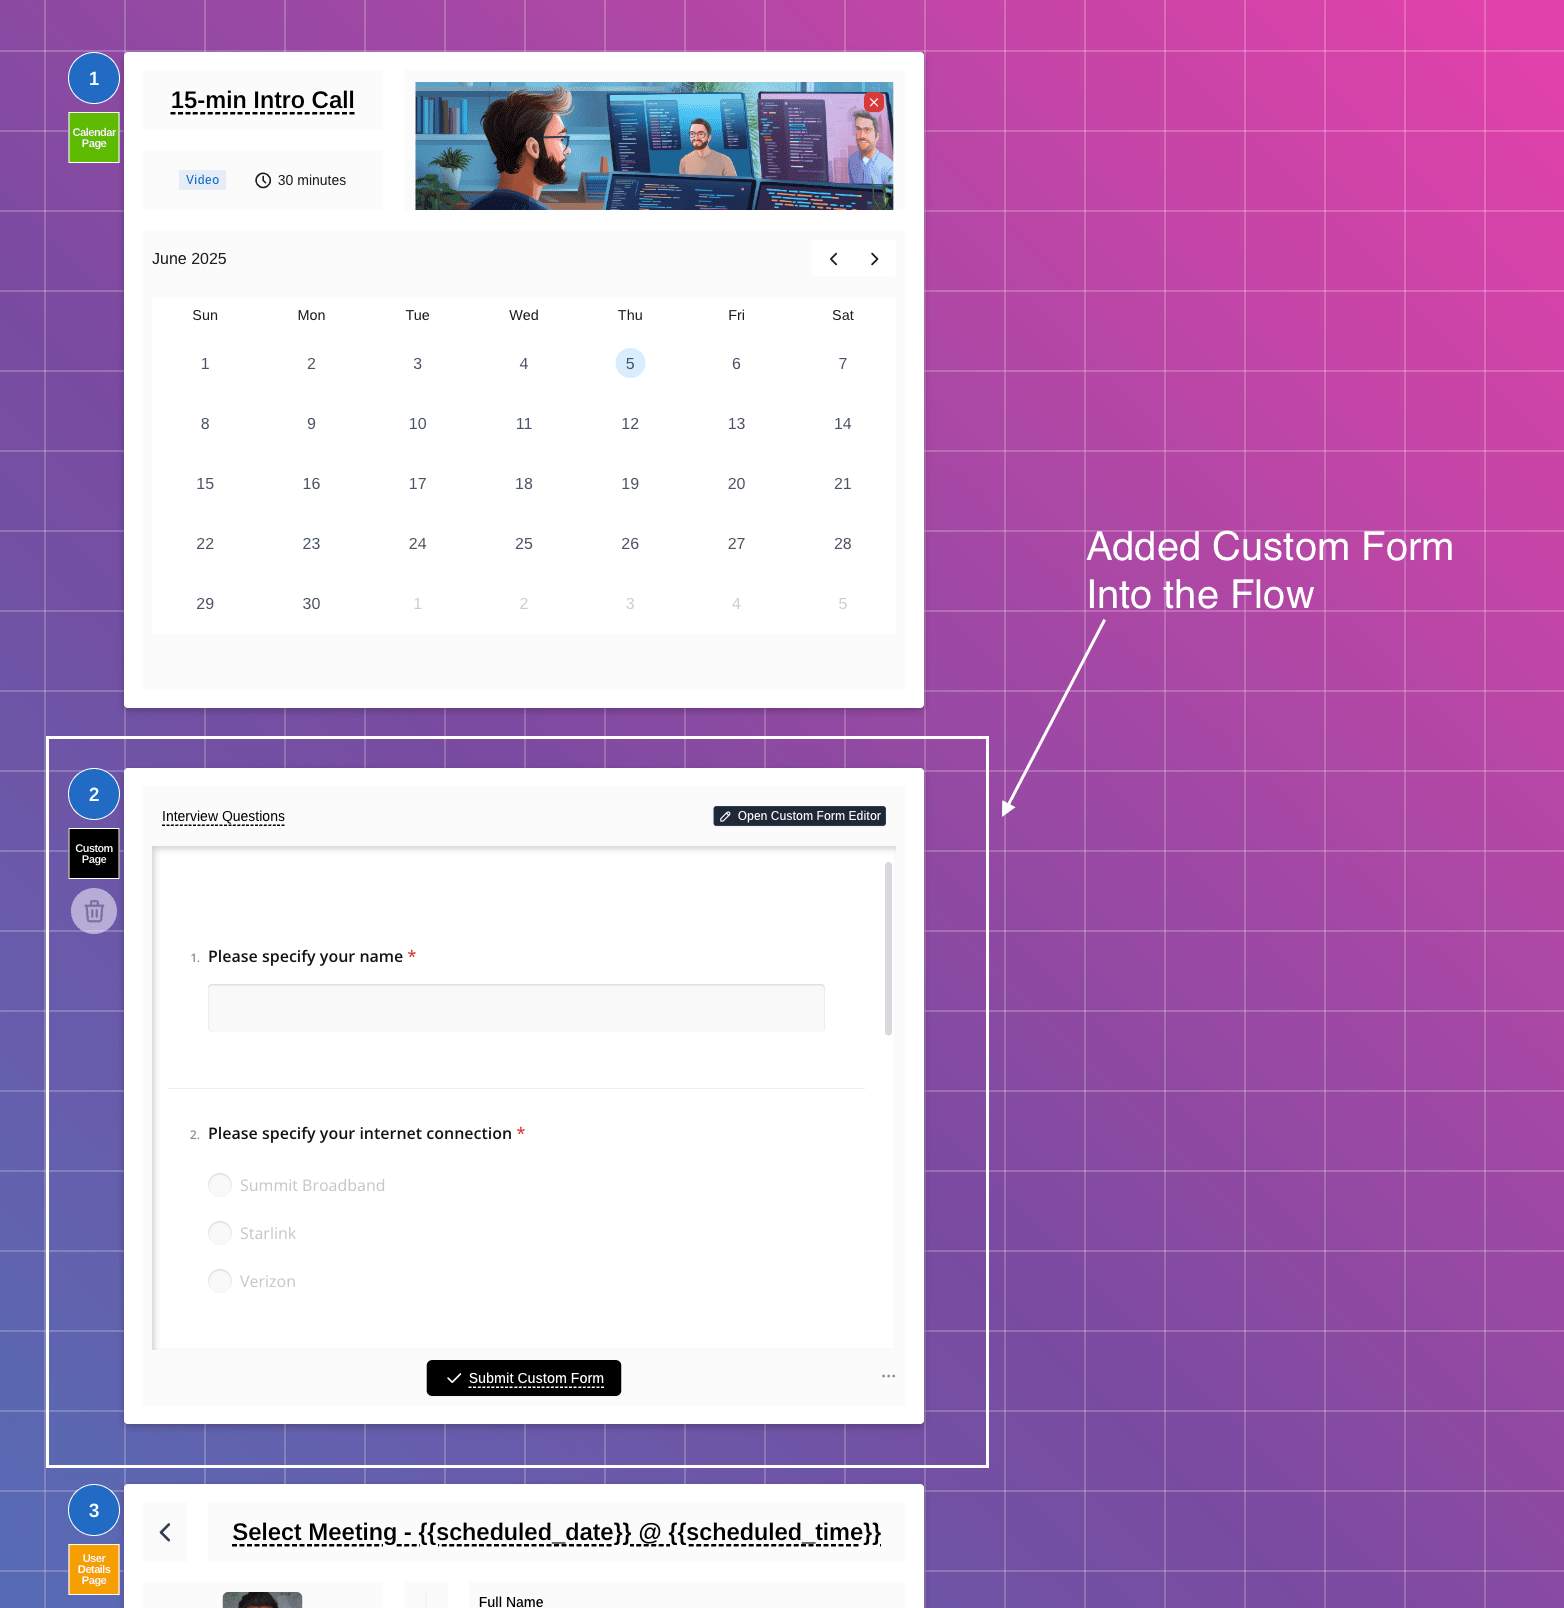
3. Understand the 3-Page Flow
The editor gives you three pages to work with:
- Calendar Page – Visitors pick a time that works.
- User Details Page – Collects info like name, email, and notes.
- Confirmation Page – Displays all the meeting details once booked.
4. Customize the Layout (Plan Dependent)
- Drag-n-drop elements like text, phone fields, dividers, etc.
- Free plan users can’t change layout, but can update titles, host info, etc.
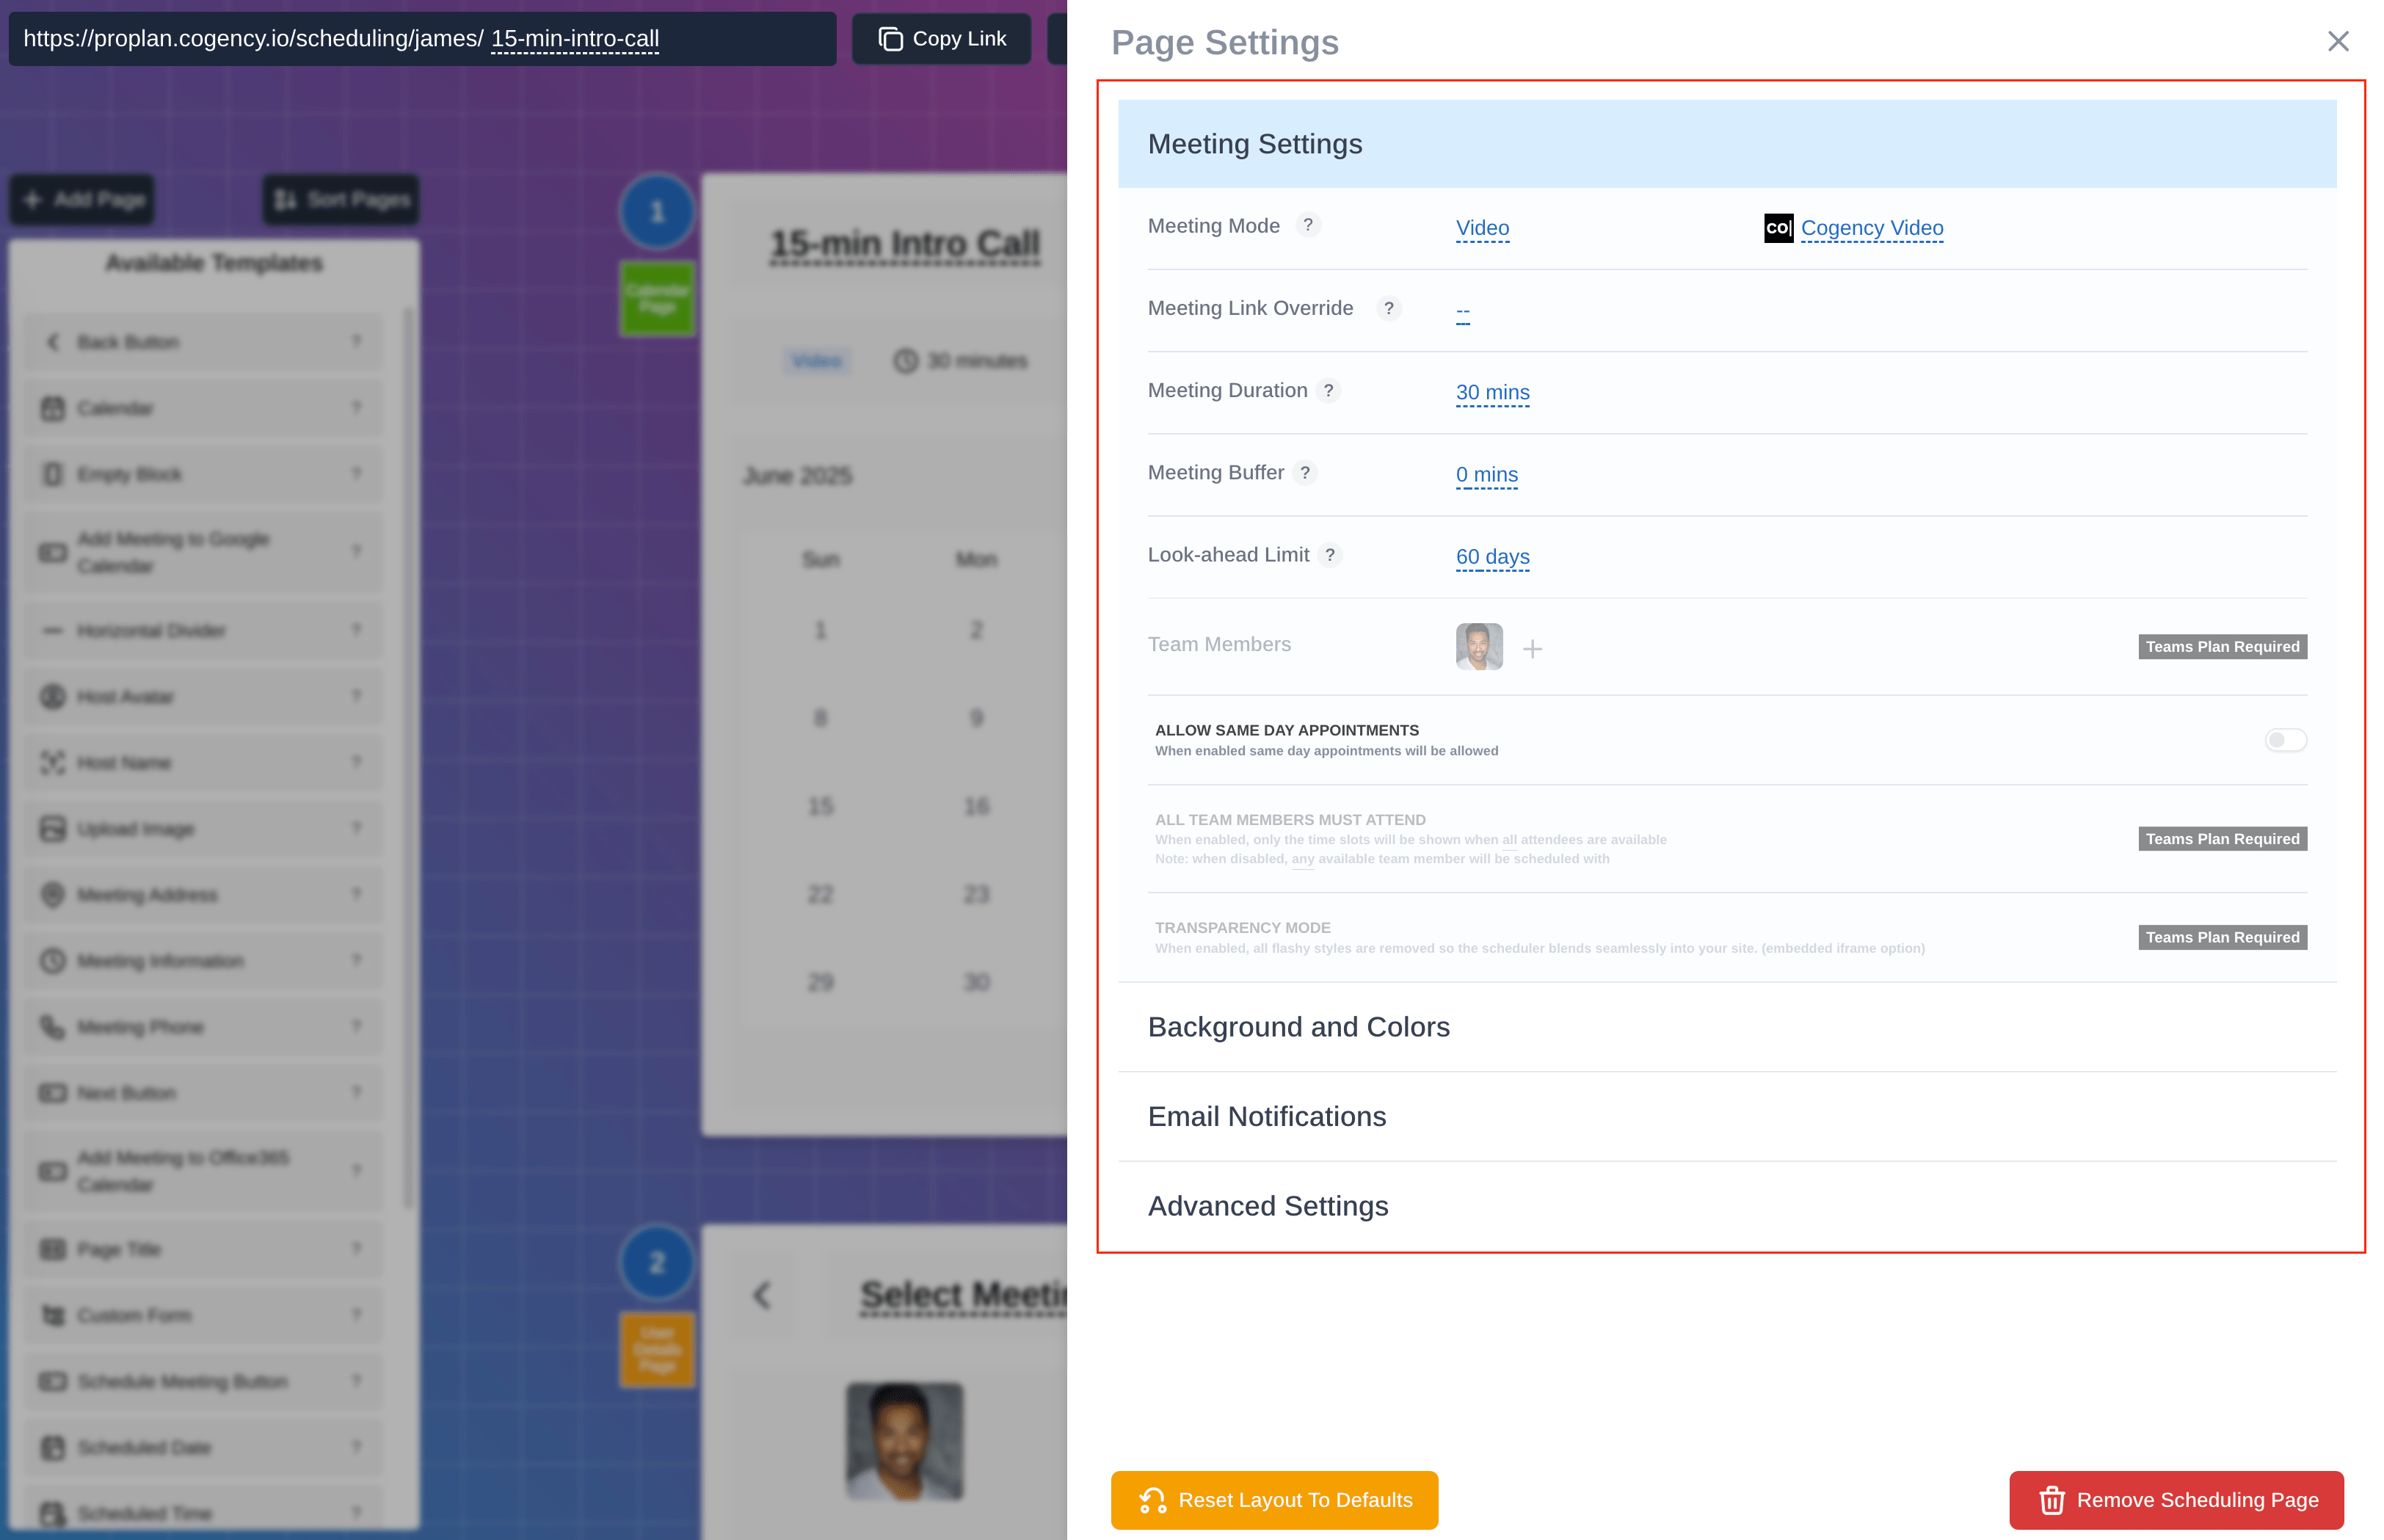
5. Go Deeper in the Settings Panel
Here’s where the magic happens. You can tweak:
- Meeting Mode: Video, in-person, or callback
- Static Meeting Link override
- Duration, buffer time, and look-ahead limit
- Team scheduling: round-robin or all attend
- Same-day appointments toggle
- Transparency Mode: removes styling when embedded
- Background customization: image, gradient, text color
- Email notifications: brand name, support URL, etc.
- Post-back URL (webhooks) for automation
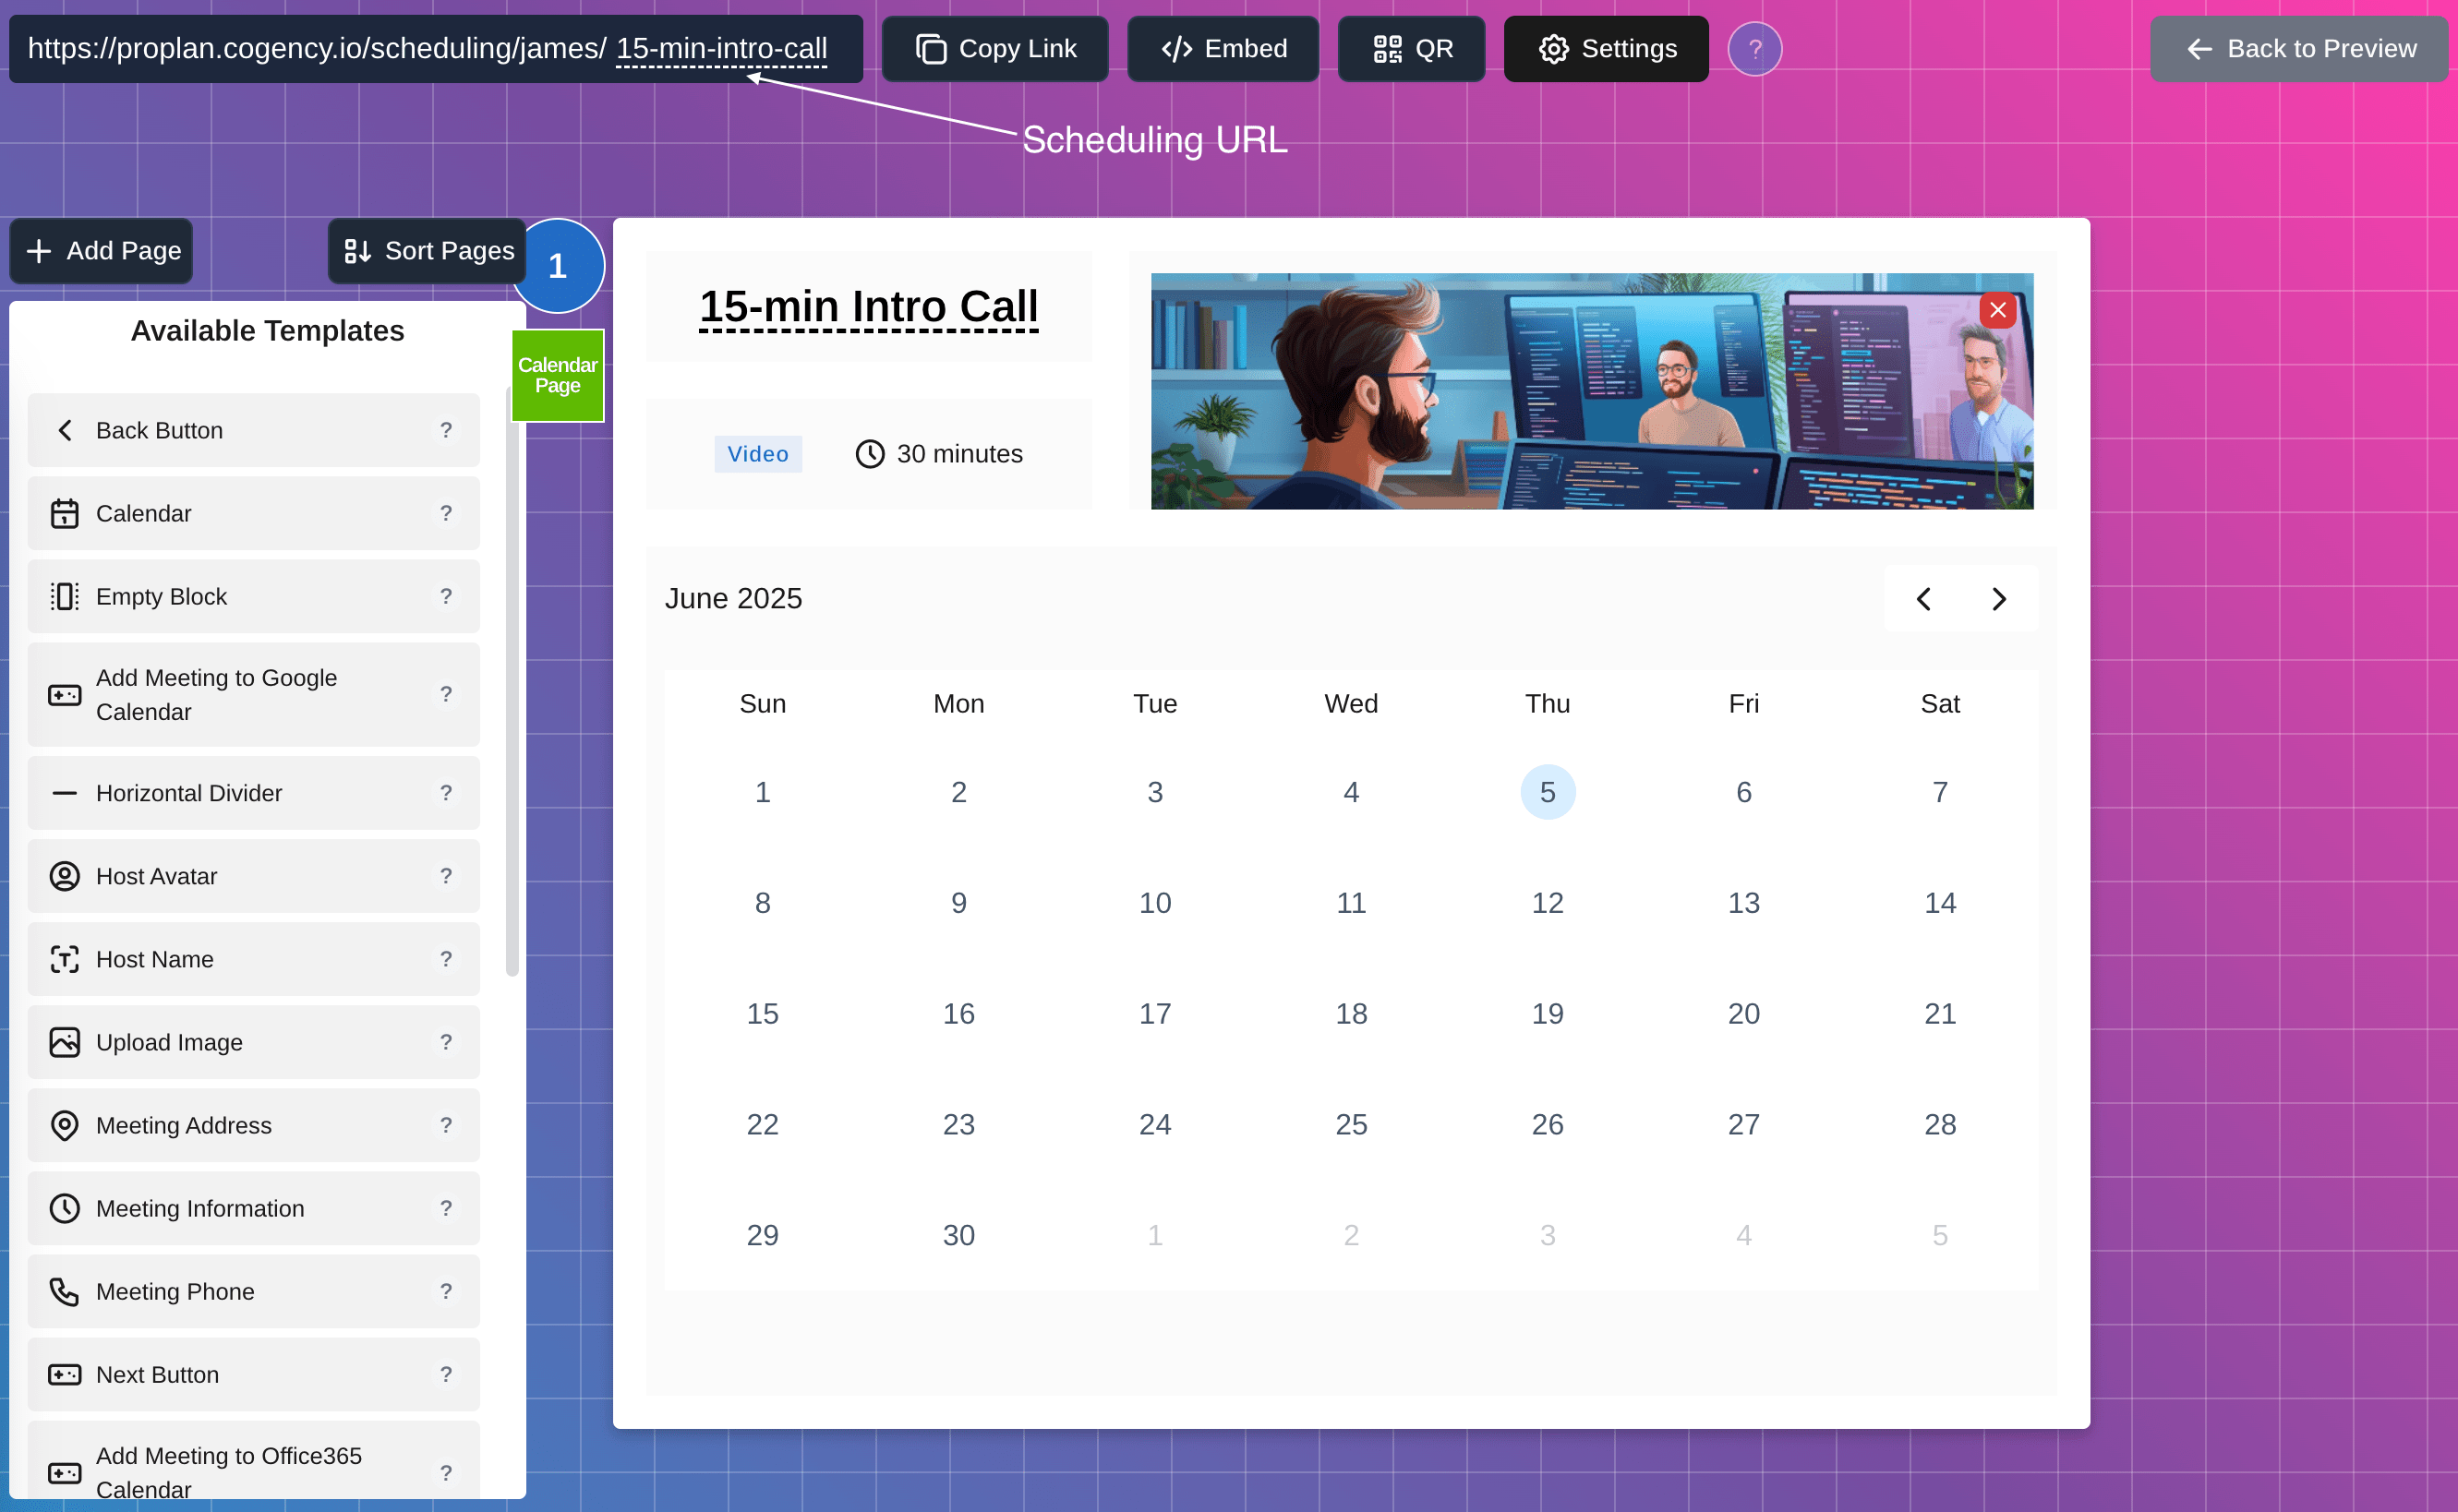
6. Update the Scheduling Page URL
At the top-left, you’ll see your page’s URL. Click to update it if needed.
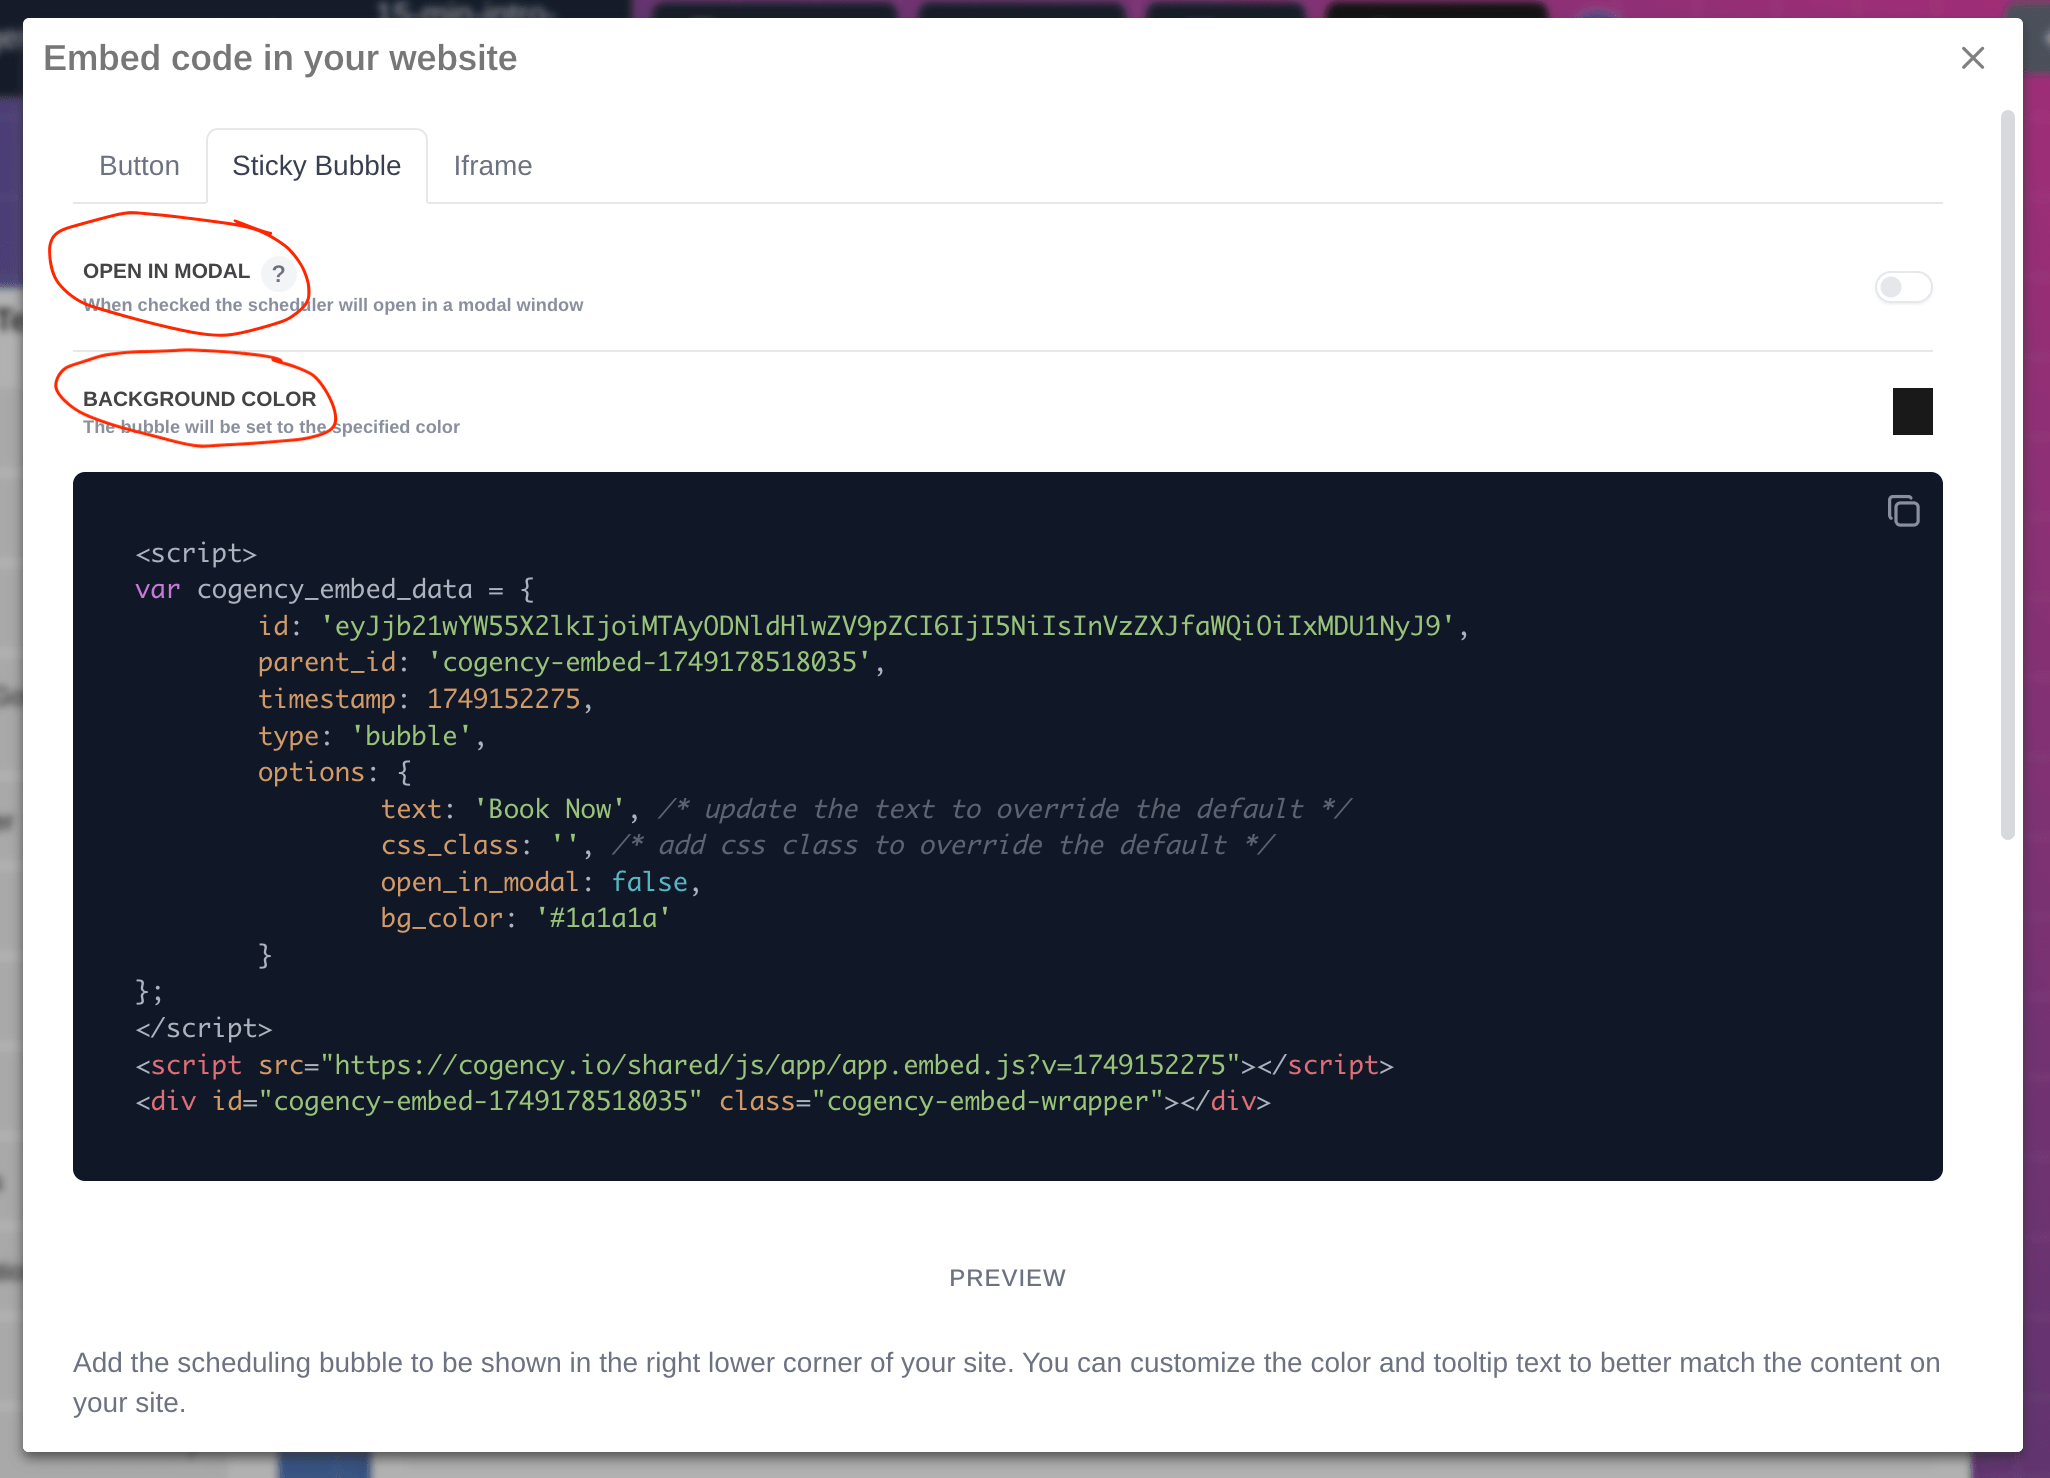
7. Choose Your Embed Option (optional)
Make your scheduler available anywhere:
- Button – Opens scheduler in new tab
- Sticky Bubble – Floats on your site, opens in a modal (customize color)
- Iframe – Embed directly into your site (works best with transparency mode)
8. Add Custom Forms (optional)
Want to ask more questions before booking? Add a custom form page to the flow.
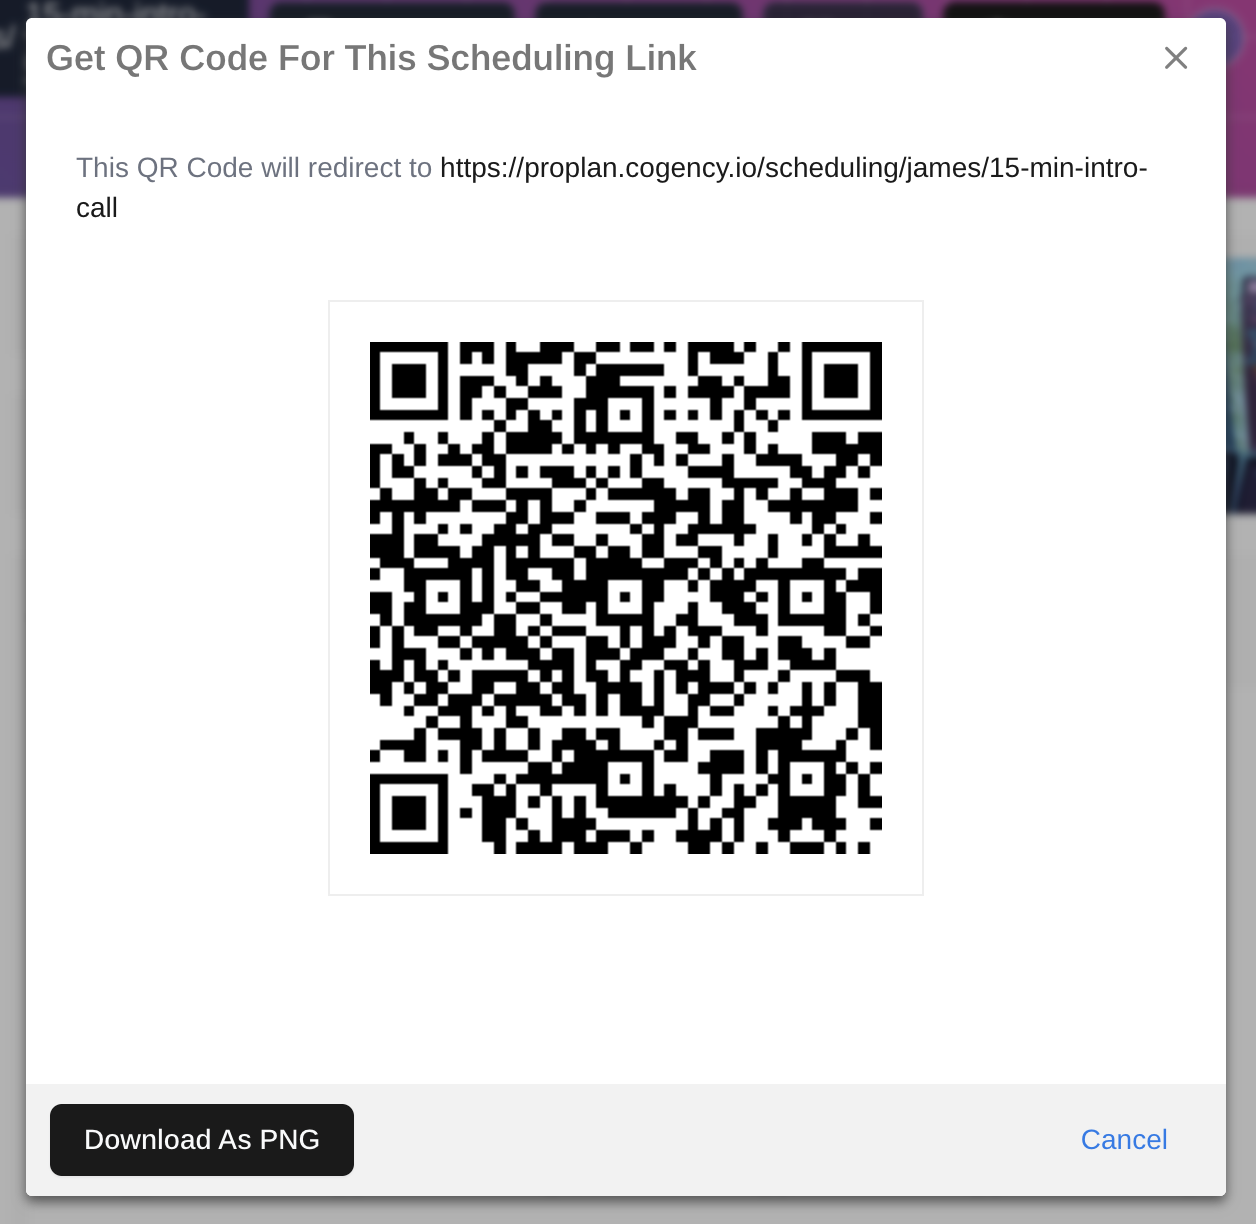
9. Share with a QR Code
Need to print or post it? Just click the QR button in the top header to generate a QR code for your scheduling page.
That’s it! You’re officially up and running. Whether it’s client calls, demo requests, or internal check-ins—your Cogency scheduler has you covered.
-- Cogency Team